For my private projects I prefer postman for testing REST services because it’s so simple and fast to use but recently I had to have a closer look at SoapUI because this is my only available choice in my current project at work. So I’ve got along with it’s – in my opinion terrible – (Java) UI and the absence of all the fancy features of the Pro version (using the free version) and naturally the next question was how to include that into the CI chain. And although it’s not yet clear whether we’re gonna use Jenkins or Teamcity I wanted to give it a try with Jenkins because this is what I know and use for my private projects. Google gave me – as expected – a lot of hits for “SoapUI Jenkins” but I didn’t want to fiddle with Maven or Ant configs (I have to admit that I’m not good with that stuff) so I spend an hour (or two) to find a very simple solution which works for Freestyle, Maven and Ant projects. So here is what I’ve achieved so far and I hope you’ll find it useful.
What will be covered
- installing SoapUI on a LINUX server
- getting SoapUI testrunner running
- setup a very simple Jenkins project just to run a SoapUI test project
- show test results using the xUnit Jenkins plugin
What won’t be covered
- creating tests with SoapUI
- installing Jenkins
- creating “real” projects with Jenkins (build, unit test, deploy etc.)
- running the SoapUI test as an Ant or Maven target/task
- installing JRE (I assume it is required to run SoapUI testrunner but might be already covered with a running Jenkins installation)
- LINUX ‘basics’ like what user to use for the installation, sudo, chmod, chown, etc.
Prerequisites:
- LINUX (Debian 8.4 in my case)
- Jenkins with xUnit and JUnit plugins installed
- JAVA 7 (or higher) JRE installed
- REST or SOAP application (API) to test
- SoapUI project with tests for the application
- optional: mySQL (or other DB supported by SoapUI, see https://www.soapui.org/jdbc/reference/jdbc-drivers.html)
- experience with LINUX and Jenkins
1) Get SoapUI
- goto SoapUI’s website (http://www.soapui.org)
- and there to Downloads, Alternate Platforms (https://www.soapui.org/downloads/open-source.html)
- download “Linux tarball (Java not included)”
Alternative: copy download link and “wget” it from command line (e.g. “wget http://cdn01.downloads.smartbear.com/soapui/5.2.1/SoapUI-5.2.1-linux-bin.tar.gz” )
2) Install SoapUI
- go to the place where you have downloaded the tarball to
- extract it (e.g.: “tar xvfz SoapUI-5.2.1-linux-bin.tar.gz”)
- move the folder “SoapUI-x.x.x” to the place where you prefer to have your apps installed (e.g. “/usr/local”)
- Optional: symlink to current version (e.g. “ln -s SoapUI-5.2.1 SoapUI”)
- symlink to testrunner.sh in a directory which you usually have in PATH (e.g.: /usr/local/bin)
I wanted a more sounding name so I did “ln -s soapuirunner.sh ../SoapUI/bin/testrunner.sh” in /usr/local/bin
3) Optional: adding JDBC drivers
To be able to connect to a DB from you SoapUI tests you need to add the JDBC drivers.
I’ll only describe the steps for mySQL here but for other DBs it should be very much the same.
For the full list of supported DBs and driver sources see: https://www.soapui.org/jdbc/reference/jdbc-drivers.html.
- go to https://dev.mysql.com/downloads/connector/j/
- click on “download” next to “Platform Independent (Architecture Independent), Compressed TAR Archive”
- click on “No thanks, just start my download.” to start download
Alternative: copy link from “No thanks, just start my download.” and “wget” it from command line (e.g. “wget https://dev.mysql.com/get/Downloads/Connector-J/mysql-connector-java-5.1.39.tar.gz) - go to the place where you have downloaded the tarball to
- extract it (e.g.: “tar xvfz mysql-connector-java-5.1.39.tar.gz”)
- copy the driver file (e.g. mysql-connector-java-5.1.39-bin.jar) from the mysql-connector folder to bin/ext/ in your SoapUI installation folder (/usr/local/SoapUI/bin/ext in my case)
4) Testing the installation
Assuming that you have already created a working test project in SoapUI (e.g. on your local development machine) we can do a quick check of what we have installed so far.
If you are using JDBC in your tests then make sure that the DB exist and is reachable.
(I have mySQL and an instance of the DB dedicated for testing running on same server)
- create a separate folder (e.g. $HOME/temp/soapui/) and place a SoapUI test project file (e.g. test-soapui-project.xml) there
(the separate folder is not really required but it makes it easier to see the output files produced by the testrunner) - set the SOAPUI_HOME to the location where you have installed SoapUI (e.g. “export SOAPUI_HOME=/usr/local/SoapUI”)
Note: Jenkins does not consider ENV variables you set “the usual way” (e.g. in .bashrc), we’ll come to this later. - run you SoapUI test project, e.g.: “soapuirunner.sh -j -e “http://localhost/soapuitest” test-soapui-project.xml”
the -e option specifies the end-point of the application to test (you should have it up ‘n running there 😉 ) - if all goes smooth then you should have at least 2 new files in your current directory:
- test result file in xUNIT format (this is what the “-j” option is for), e.g: TEST-test_Testsuite_JWT.xml
- logfile from SoapUI (soapui.log)
- Possibly you’ll see some other files as error log and files for failed test cases. That’s not necessarily bad for what we wanted to achieve. However: better check them to see whether there are any general problems.
(e.g. failing DB connection etc.) - During the run you’ll see some java exceptions for pretty sure but in my case they had to negative impact on the desired result.
5) Preparing Jenkins
Assuming that you have Jenkins up ‘n running and the plugins installed as mentioned above there is only one thing you have to do to be able to run SoapUI testrunner which is to set the SOAPUI_HOME.
- in Jenkins UI go to “Manage Jenkins” => “Configure System”
- in section “Global properties” => “Environment variables” add a variable as Name = SOAPUI_HOME and Value = <location of your SoapUI installation> (“/usr/local/SoapUI” in my case)
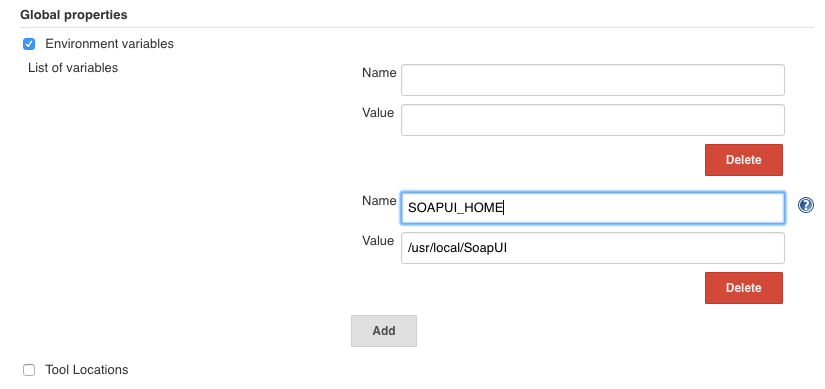
- save changes
6) Setting-up a Jenkins project to run the tests
I skip setting-up a ‘real’ project which receives a push from code repo, pulls code, builds, unit tests, deploys etc. and focus on just running the tests and getting the results.
In a ‘real’ project you will probably have the SoapUi project file in your code repository and pull it from there when building your project in Jenkins but for our simple test it should be okay just to place the project file somewhere Jenkins can access it, e.g. create a directory in the Jenkins $HOME and put the file there ($HOME/soapui/ in my case).
- create a new Jenkins “freestyle project”
- Note: if you what to use this solution within a Maven project the add the following under “Post Steps” and for an Ant project under “Build”
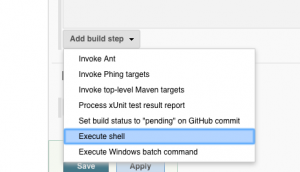
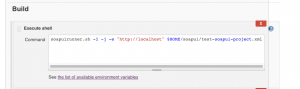
- add Build step “Execute shell”
- enter in the command box: “soapuirunner.sh -I -j -e “http://localhost” $HOME/soapui/test-soapui-project.xml” (-I is for ignoring all error from running testrunner, adjust the SoapUI project file name to your actual filename)
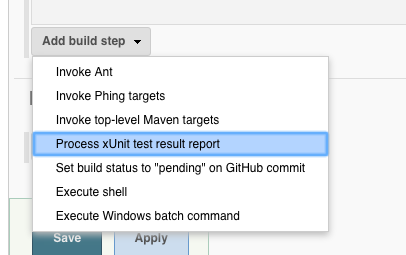
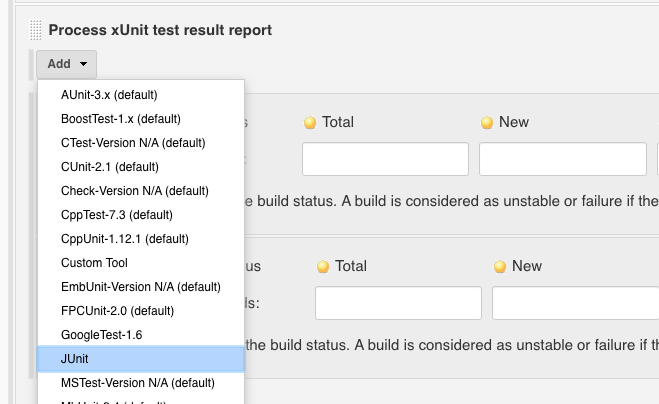
- add Build step “Process xUnit test result report”
- Add “JUnit-Style” because SoapUI outputs logs in JUnit format
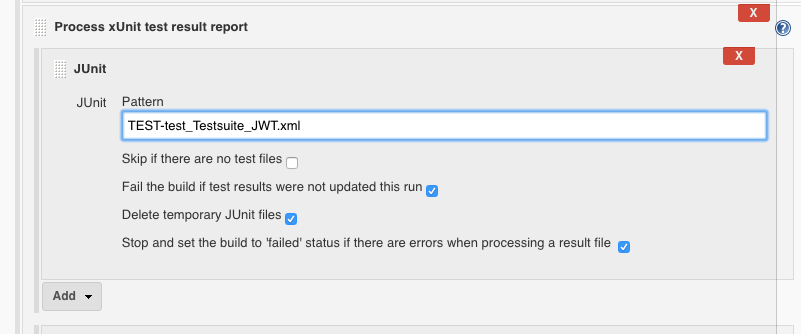
- enter the expected name for the xUNIT-style SoapUI report for JUnit Pattern (“TEST-test_Testsuite_JWT.xml” in my case)
- I want the build to be considered as failed even when a single test case fails so I set the thresholds accordingly:
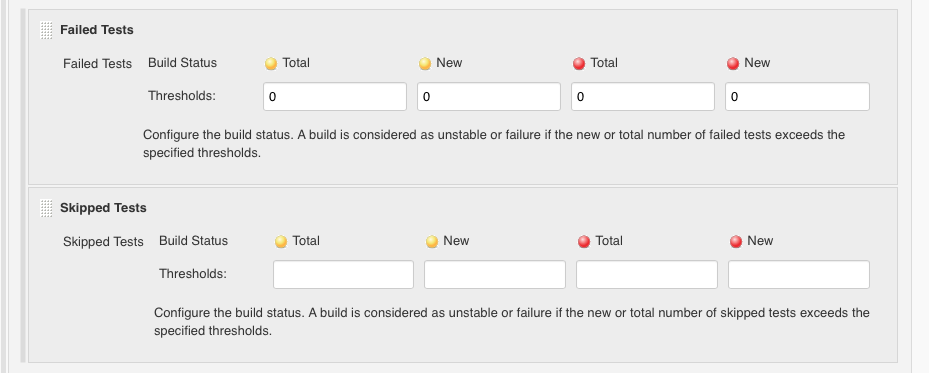
- save changes
7) Running the tests
As we have no build triggers configured we simple manually “Build Now” on our Jenkins project.
If all runs smooth you should see something like this:
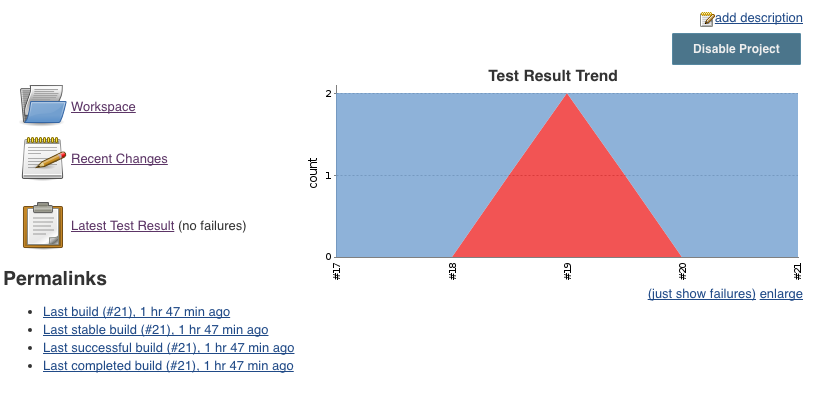
And when you drill-down “Latest Test Results” you should get something like this:
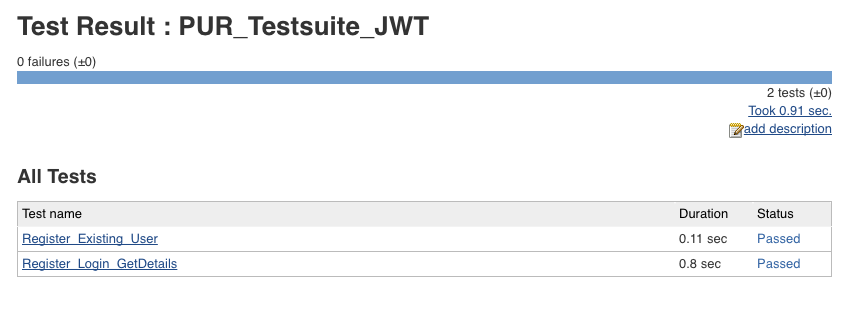
Final words
As you can see basic integration of SoapUI test runner is fairly simple.
The only things to pay attention to are:
- setting SOAPUI_HOME ENV variable in Jenkins
- using -j option in the call to testrunner.sh (soapuirunner.sh in my case) to output xUnit reports
- giving the xUnit plugin the right filename to read
- installing the JDBC driver if you use this option in your tests (I’ll cover running SQL commands from SoapUI tests in an other post)
Any questions, corrections, additions? Just leave a comment, I’ll get back to you soon. Share if you found this useful.
Hi ,
I have followed the same procedure in my machine, I am getting testrunner.sh file not found in Jenkins console output.
Hi Chander,
testrunner.sh must be available in PATH of the user under which you run jenkins. Check section “2 Install SoapUI” again where I describe how I make the script available. You may also add the location of the script directly to user’s PATH (e.g. in .bash_rc) You can simply check from the command line “which testrunner.sh”. If you get a result: all good, if not: fix it 😉 If you are running windows: same story: add to PATH.
Hope that helps
Philipp
Hi Philipp,
Thanks for your response, Now i have given correct path now its locating the testrunner.sh file but getting another error,
================================
=
= READY_API_HOME = /usr/local/ReadyAPI-2.5.0-m-SNAPSHOT
=
================================
2018-11-15 08:49:53,901 main ERROR Unable to invoke factory method in class com.eviware.soapui.support.log.SplashAppender for element SPLASH: java.lang.NoClassDefFoundError: javafx/scene/control/DialogPane java.lang.reflect.InvocationTargetException
I am using ubuntu machine environment and that too my Jenkins located in Docker container.
Please help me out with answer!!
Thanks and in Advance!!
Chander
Hi Chander,
no idea 🙁
Maybe this thread helps a little: https://community.smartbear.com/t5/SoapUI-Pro/Ready-API-2-3-0-Error-when-launching/td-p/162606.
Might be a good idea to post your issue there as well.
What’s strange to me: why it is looking for a GUI (JavaFX) component when running on command-line…
Cheers
Philipp
can I share it ?